Thursday, August 15, 2013

Front Wheel and Seat Logo


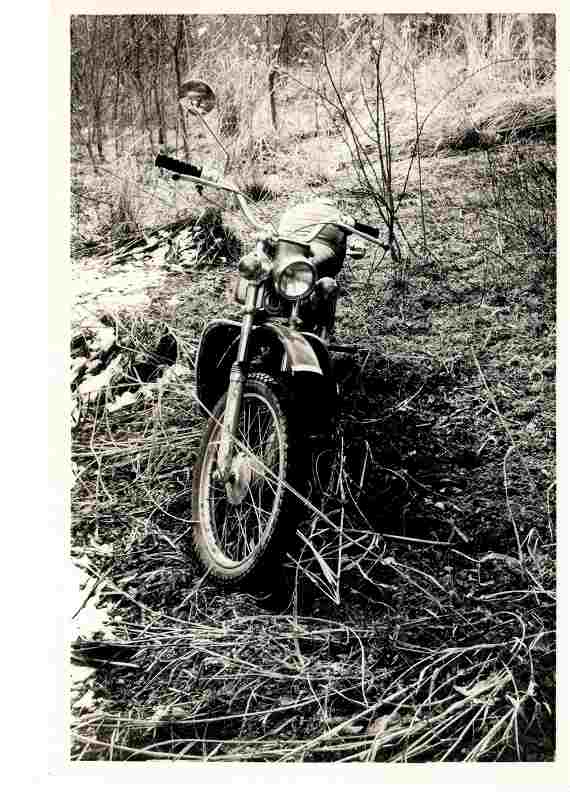
Progress!  I finally installed the good front wheel with new brakes and seal. The photos aren't the best (end of the day, low light). Replacing the rusted spokes and oxidized hub makes a real difference in looks.  


I installed the front brake, clutch, speedometer and throttle cables.  I also installed the instrument lights.  


I also stenciled the Honda logo on the seat using vinyl paint.  It came out "ok" and I learned some things about how to properly stencil in 90 degree F heat.


The logo passes the "3 foot" test...
Next up, finish the headlight and wiring, install the fuel line and tank logos, install a new petcock,  battery, fresh oil, fuel and get ready to attempt starting the beast.

Tuesday, August 13, 2013

Round Two (Preliminary)

 My blue SL90 is getting close to being finished and I'm lining up the parts to start "Round Two" (the red SL90)


I've been able to locate all of the "tins" for the red Sl90, including the side cover.  I'll start the body work soon and get the tins prepared for the Candy Red coating.  The metal parts look fairly 'beat up" by the usual sun exposure, rust and dents...

Saturday, August 10, 2013

Handlebars

I had the stock SL90 handlebars re-chromed and I picked them up from the plater yesterday.  They are the last item that I decided to chrome.  I held off re-chroming them thinking the old chrome might be good enough, but when the handlebars were installed next to the freshly chromed parts, they looked pretty awful


Here's a comparison shot showing the freshly re-chromed handlebars (top) compared to what you typically find when searching for stock SL90 handlebars (rusty and sometimes bent).


Newly installed handlebars - note the headlight bucket full of wires. I'm waiting for some new 6 volt instrument light bulbs to finish off the wiring.  They are scheduled to arrive in two days along with the new wheel bearings for the front wheel.  You can see the black air intake boot (tube) attached to the air filter box.  The rubber was as hard as a rock and I could not install the boot on the carburetor as it would not flex.  I obtained a bottle of "Rubber Renew" and soaked the boot in it by placing it in a zip-lock plastic bag with the liquid.  After 48 hours, the rubber magically became pliable and flexible - almost like new - and I was able to install it with no difficulty.  


Tuesday, August 6, 2013

Monday, August 5, 2013

Gas Tank Emblems

I restored the Honda gas tank emblems while waiting for the front wheel bearings to arrive.

 Before

After

I repainted the emblems white, then I lightly sanded the letter faces and repainted them black, even though the original letters were a sliver gray (I could not get them to look right)

Same treatment for the wings (below), paint and sand (no black of course)


Now I'm working on restoring the carburetor intake rubber and making a new air filter element.

In the meantime, here are two more examples of modified Honda Sl90's for your viewing pleasre - one in the scrambler colors (red & silver) and a red SL90 with dirt bike fenders...


Saturday, August 3, 2013

Rear Wheel Installation


I spent a few hours installing new wheel bearings, grease, seals, brake shoes and springs, the cush drive rubbers and all of the related parts for the brake and rear wheel assembly.

For reference, here's the rear of my SL90 in September 2012 - the starting point.

Here's what it looks like now (August 2013) - it's almost been 1 year!  I will need to install the drive chain and adjust the rear wheel and brake accordingly.  The rear brake works - the new shoes really hold.

The front wheel will be relatively simple compared to the rear wheel.  I thought I had wheel bearings in my inventory for the front wheel, but no such luck.  I had to order a set (and wait)...

Friday, August 2, 2013

Modified Honda SL90's

The red SL90 in my last post inspired me to look for modified or custom Honda SL90's.  Since I have an extra frame and parts, I wanted to get some ideas for what could be done with the SL90.  Here are some examples:

First up - a black and silver variation.  The bike looks basically stock with just the color change. 
 I noted that this black and silver SL90 is for sale (on Craigslist) in Alabama

 Next up, an SL90 disguised as a BSA thumper. The owner did a really great job of transforming the SL90 with some nice touches.

This BSA poser was also for sale on Craigslist several months ago.


Here's an interesting bitsa that demonstrates how an SL90 frame can be married to Postie and other parts to make a "cafe racer" style bike (check the swingarm and forks)  This one ended up being turbocharged as I recall...


Sl90 Chopper, "Easy Rider Style" (below)...